
If you sell clothing online, you’ve probably seen product photos where a shirt or jacket seems to float in perfect shape, with no person inside it. That is ghost mannequin photography. It’s one of the most widely used styles in fashion e-commerce, and this guide covers what it is, how it’s made, and how to get it right.
What Is Ghost Mannequin Photography?
Ghost mannequin photography, also called invisible mannequin or hollow man photography, is a technique that shows clothing in a three-dimensional, “worn” shape without showing the mannequin or model. The garment is photographed on a mannequin, and the mannequin is then removed in post-production. The inside of the collar, sleeves, and hem are filled in so the garment looks natural and full.
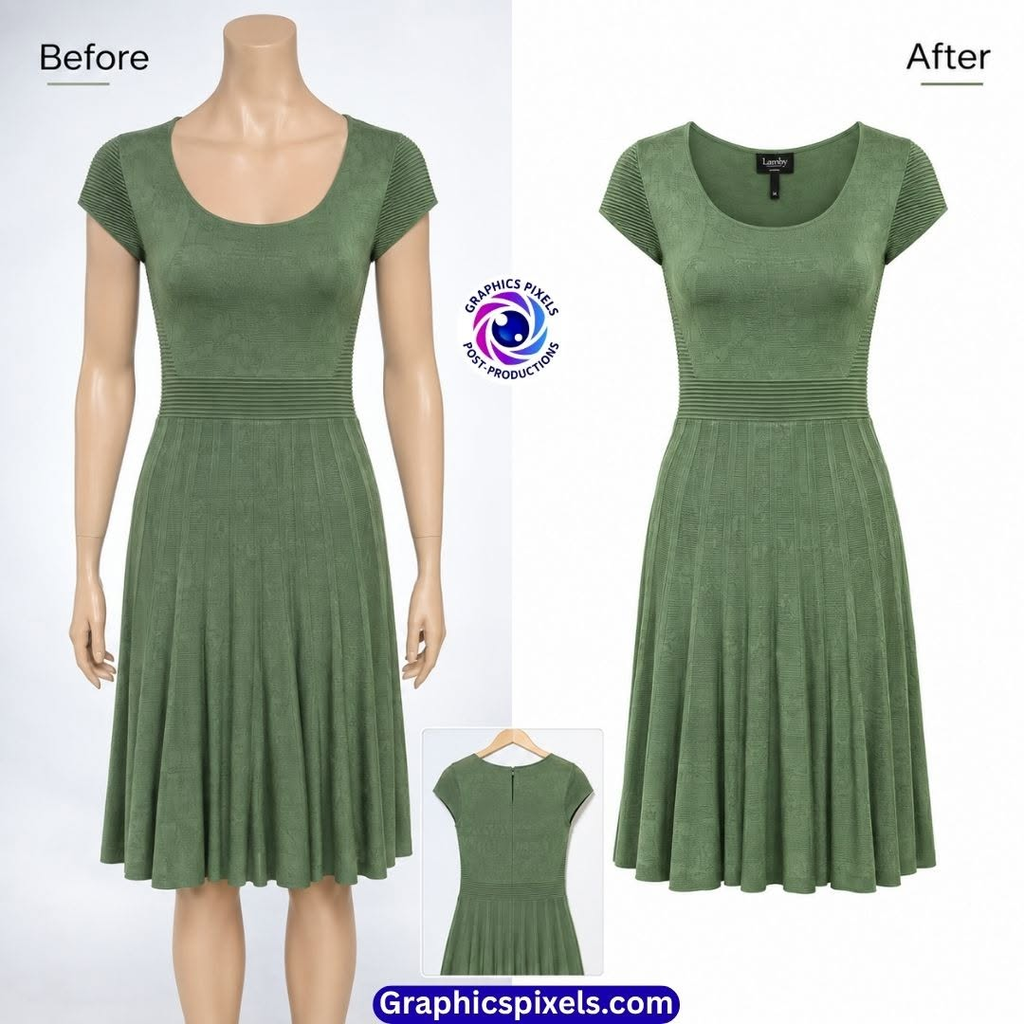
The result is a clean image that shows fit, structure, and design details, while keeping the buyer’s attention on the product itself.
Why Online Stores Use It
- Shape and volume. Customers see how the garment holds its form, which a flat lay can’t fully show.
- Consistency. Every product has the same angle, lighting, and style, so the catalog looks organized and professional.
- Lower cost than models. You don’t need to hire, schedule, and style a model for every item.
- Marketplace friendly. Clean images on plain backgrounds suit platforms like Amazon, eBay, Etsy, and Shopify.
- Reusable. One shoot setup can handle hundreds of products across seasons.
Equipment You Need
You don’t need a huge studio, but you do need consistency.
- A mannequin. Ideally a ghost mannequin form with removable neck, arm, and torso parts, so you can shoot the inside areas later.
- A camera. A DSLR or mirrorless camera with a decent lens. Keep the same lens and distance for the whole collection.
- Lighting. Soft, even light such as softboxes or a light tent. Avoid harsh shadows.
- A plain background. White or neutral paper or fabric, so cutting out the product is cleaner.
- A tripod. Fixed position means all images line up.
- Styling tools. Steamer or iron, clips, pins, and tape to shape the garment.
- Editing software. Adobe Photoshop is the common choice, along with a tablet or mouse for precise cutouts.
How Ghost Mannequin Photography Works: Step by Step
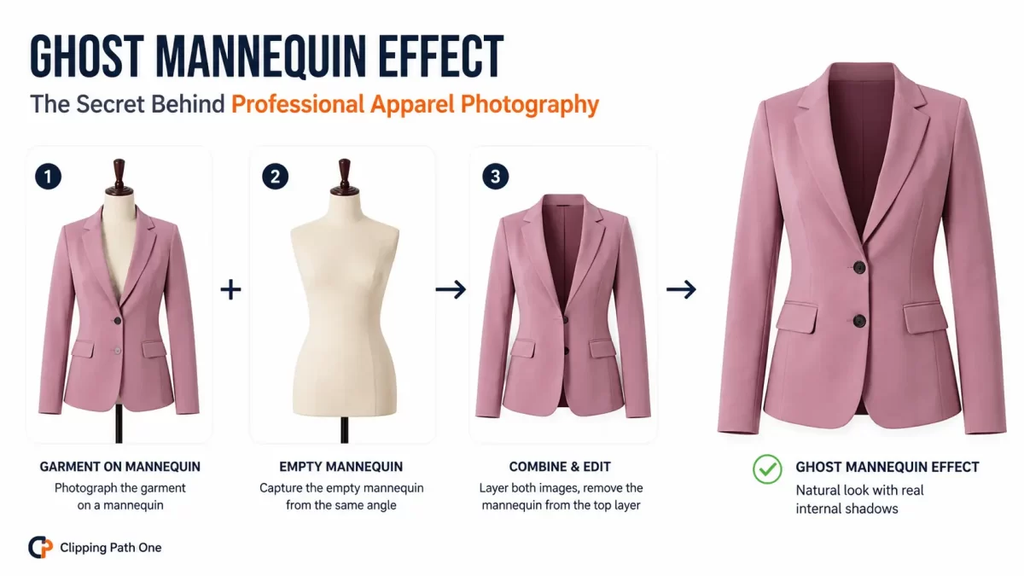
Step 1: Prepare and style the garment
Steam or iron the clothing. Dress it on the mannequin and use clips or pins at the back to remove loose fabric so the front looks smooth. Straighten the collar, sleeves, and hem.
Step 2: Shoot the front (and other angles)
Photograph the garment from the front, and take back and side shots if your store needs them. Keep the camera position, lighting, and distance identical for every product.
Step 3: Shoot the inside shots
Remove the garment and turn it so the inside back of the neck (and any other part that would be visible) is facing the camera. Photograph these areas. Many people shoot the inside neck on the mannequin neck part or flat to match the angle.
Step 4: Remove the mannequin
In editing, cut the mannequin and any supports out of the image. Precision matters here, especially around the collar, sleeves, and fine fabrics like lace or mesh.
Step 5: Join the inside shot (neck joint)
Place the inside-neck image into the opening so the collar looks hollow and realistic. This step is why the service is often called neck joint editing.
Step 6: Clean up and color correct
Remove wrinkles, dust, and uneven areas. Match the color to the actual garment to reduce returns caused by color differences.
Step 7: Export for your platform
Resize and save the final image with the background and dimensions your sales channel requires.
Ghost Mannequin vs Flat Lay vs Model Photography
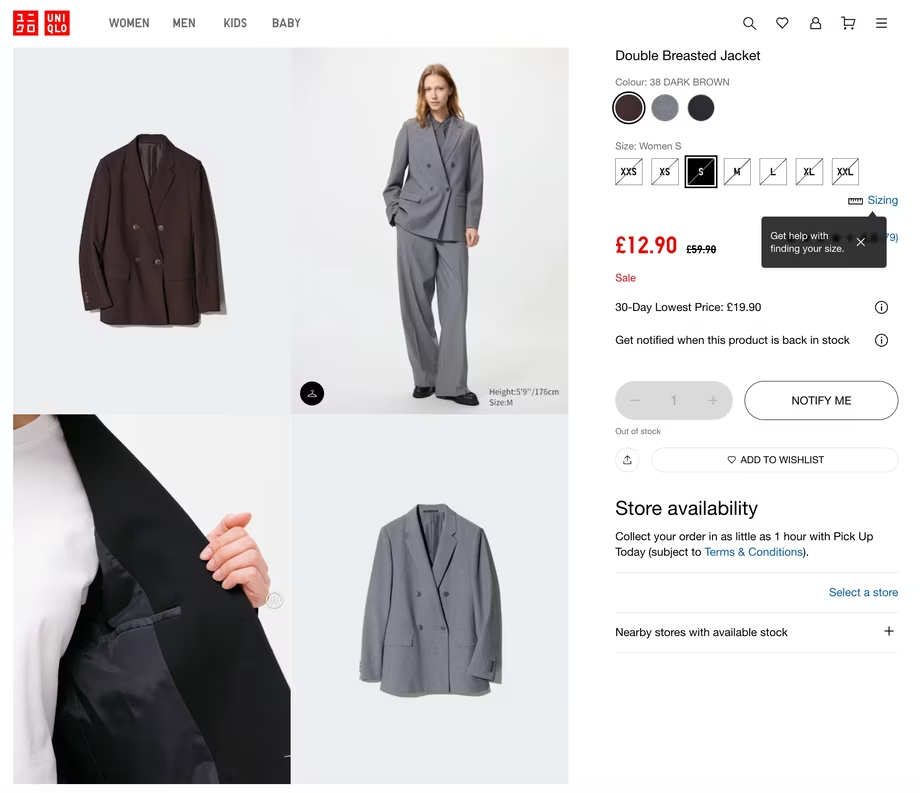
Ghost mannequin shows shape and structure at moderate cost and keeps the catalog consistent.
Flat lay is the cheapest and fastest, but garments can look flat and lifeless.
Model photography best shows fit, movement, and style, but costs the most and takes the longest.
Many brands use ghost mannequin images as the main product photo and add model images for lifestyle and fit.
What Garments Suit This Style?
It works especially well for shirts, T-shirts, jackets, blazers, coats, hoodies, dresses, and tops. It’s less effective for very loose, flowing, or stretchy items, and for products where fit on a body is the main selling point, such as swimwear or shapewear.
Common Mistakes to Avoid
- Uneven lighting between outer and inner shots. The collar area looks pasted in.
- Poor styling. Wrinkles and crooked seams are time-consuming to fix.
- Missing inside shots. The garment looks flat or “empty” at the neck.
- Relying only on automatic tools. Quick auto-cutouts often leave rough edges, especially on detailed fabric.
- Inconsistent size and framing. Products look unprofessional when placed side by side.
- Wrong colors. An edited image that doesn’t match the real item leads to returns.
Tips for Professional Results
- Shoot in high resolution so you have room to edit.
- Create a short style guide for your team: background, margins, image size, and angles.
- Label inside shots clearly so they match the correct product.
- Check final images at 100% zoom for edge problems.
- Review your marketplace’s current image rules before exporting, since they change from time to time.
DIY or Outsource?
For a small catalog, you can learn the process and do it yourself. For larger catalogs, seasonal launches, or tight deadlines, outsourcing often saves time and keeps quality consistent. A professional team can handle neck joints, cutouts, and color matching in bulk, so you can focus on shooting, styling, and selling.
If you want to see what that looks like, our ghost mannequin service offers a free trial: send a few images and review the results before ordering more.
Final Thoughts
Ghost mannequin photography gives clothing a polished, three-dimensional look at a fraction of the cost of model shoots. With good styling, careful inside shots, and precise editing, your product images can look professional, consistent, and trustworthy, which is exactly what online shoppers look for.
Frequently Asked Questions
What is ghost mannequin photography in simple words?
It’s a way of photographing clothes on a mannequin and then removing the mannequin in editing, so the garment looks worn but no one is inside it.
Are ghost mannequin and invisible mannequin the same?
Yes. They describe the same technique under different names.
Do I need to shoot twice?
Usually yes. You shoot the garment on the mannequin, then shoot the inside areas separately to fill in the hollow parts.
Can I do it with a smartphone?
You can for small stores, but a camera with consistent lighting and a tripod gives much better and more uniform results.
Is it suitable for Amazon and Shopify?
Yes, it’s widely used for both. Always check the platform’s current image requirements first.