
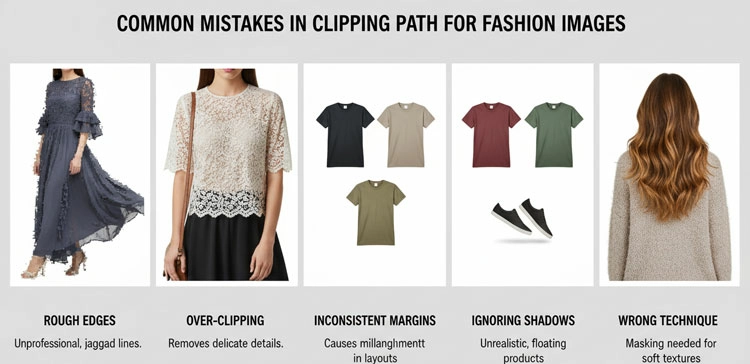
In e-commerce, your product image is your storefront, your salesperson, and your primary trust-builder. When a customer lands on your website or scrolls through Amazon, they make a buying decision in less than 3 seconds. If your product visuals look amateurish, they will bounce to a competitor.
Many online store owners outsource background removal expecting flawless results, only to suffer from hidden clipping path errors. These micro-defects—such as jagged edges, misplaced anchor points, and halo effects—might look minor on a small screen, but they severely damage your brand’s credibility, conversion rates, and even your search visibility.
Here is an expert breakdown of how these hidden flaws ruin your store’s aesthetics and exactly how to fix them.
The Big Three: Common Clipping Path Errors & Their Visual Impact
When a clipping path is done poorly—either by a rushed editor or an automated AI tool—it leaves distinct digital artifacts. Let’s look at the technical flaws that ruin product presentation:
| Clipping Error | What It Looks Like | Why It Destroys Store Aesthetics |
| Jagged Edges (Aliasing) | Rough, pixelated, or “staircase” outlines around the product. | It makes the product look cheap, pixelated, and poorly photoshopped. |
| Misplaced Anchor Points | Asymmetrical curves, flat spots on round objects, or cut-off details. | It deforms the natural, authentic shape of your physical product. |
| Halo Effects (Color Bleeding) | A thin, distracting border of the original studio background surrounding the item. | The product looks artificially pasted on a white background, destroying realism. |
How Hidden Defects Directly Damage Your E-commerce Brand
1. The Loss of Premium Brand Credibility
When a buyer zooms in on a luxury item, a watch, or a pair of sneakers, they expect to see crisp lines. If they see Jagged Edges (Jaggies), their subconscious associates the pixelation with a low-quality or counterfeit product. High-converting stores require razor-sharp boundaries to mirror the quality of the actual merchandise.
2. Distortion of True Product Shape
Every product has unique geometry. Creating a vector path requires a deep understanding of curves. When an amateur editor misplaces anchor points, a perfectly round perfume bottle can end up with awkward flat spots, or a designer handbag might lose its elegant contour. This structural distortion leads to “Expectation vs. Reality” issues, triggering high customer return rates.
3. The Artificial “Floating” Look (The Halo Effect)
If a product was originally shot on a gray or colored studio background, automated algorithms struggle to find the exact edge. They leave a 1-to-2-pixel fringe of that old background around the product. When placed on a pure white e-commerce grid, this Halo Effect makes your catalog look highly inconsistent, breaking the clean, uniform look of your store.
The Solution: How to Correct and Prevent Clipping Path Errors
Fixing these defects requires shifting away from automated shortcuts and implementing strict quality control protocols.
1. Enforce the 1-Pixel Inset Rule
To permanently eliminate the Halo Effect, professional human editors use the 1-pixel inset rule. When drawing the manual vector path with the Photoshop Pen Tool, the path is intentionally placed exactly 1 pixel inside the product’s actual boundary. This completely clips out the original background color bleeding, leaving a perfectly clean cut.
2. Master the “Bezier Curves” with Proper Anchor Density
Avoiding deformed product shapes requires optimal anchor point placement.
- Too few anchor points create rigid, flat lines where there should be smooth curves.
- Too many anchor points create a bumpy, uneven edge.
A senior retoucher knows exactly where to place handles on a Bezier curve to replicate the natural flow of the object using minimal, highly precise points.
3. Implement Anti-Aliasing and Subtle Feathering
A mathematical vector line can sometimes look too sharp, making it look unnatural. To combat Jagged Edges while keeping the boundary crisp, professional editors apply a fractional feathering technique (typically 0.3 to 0.5 pixels depending on image resolution). This slightly softens the edge transition, allowing the product to blend seamlessly onto any background web layout.
Frequently Asked Questions
Q: What causes jagged edges in product photos, and how do you fix them?
A: Jagged edges (aliasing) occur when background removal is done using automatic selection tools like the Magic Wand, which groups pixels based on color contrast rather than shapes. To fix jagged edges, you must draw a manual vector path using the Photoshop Pen Tool with anti-aliasing turned on, or apply a very subtle 0.3-pixel feather to smooth out the edge transition.
Q: What is the halo effect in photo editing, and why is it bad for e-commerce?
A: The halo effect is a thin, visible outline of the original studio background left around a product cutout. It occurs when a selection is made too far outside the product boundary. It damages e-commerce aesthetics because it makes products look poorly pasted onto the website and creates an inconsistent, messy catalog design.
Q: How many anchor points should a professional clipping path have?
A: A professional clipping path should use an optimal number of anchor points—just enough to map the product’s geometry perfectly without over-complicating it. Symmetrical or straight objects require very few points, while complex items like jewelry or sneakers require dozens of carefully placed anchor points along their Bezier curves to prevent deforming the product’s true shape.