
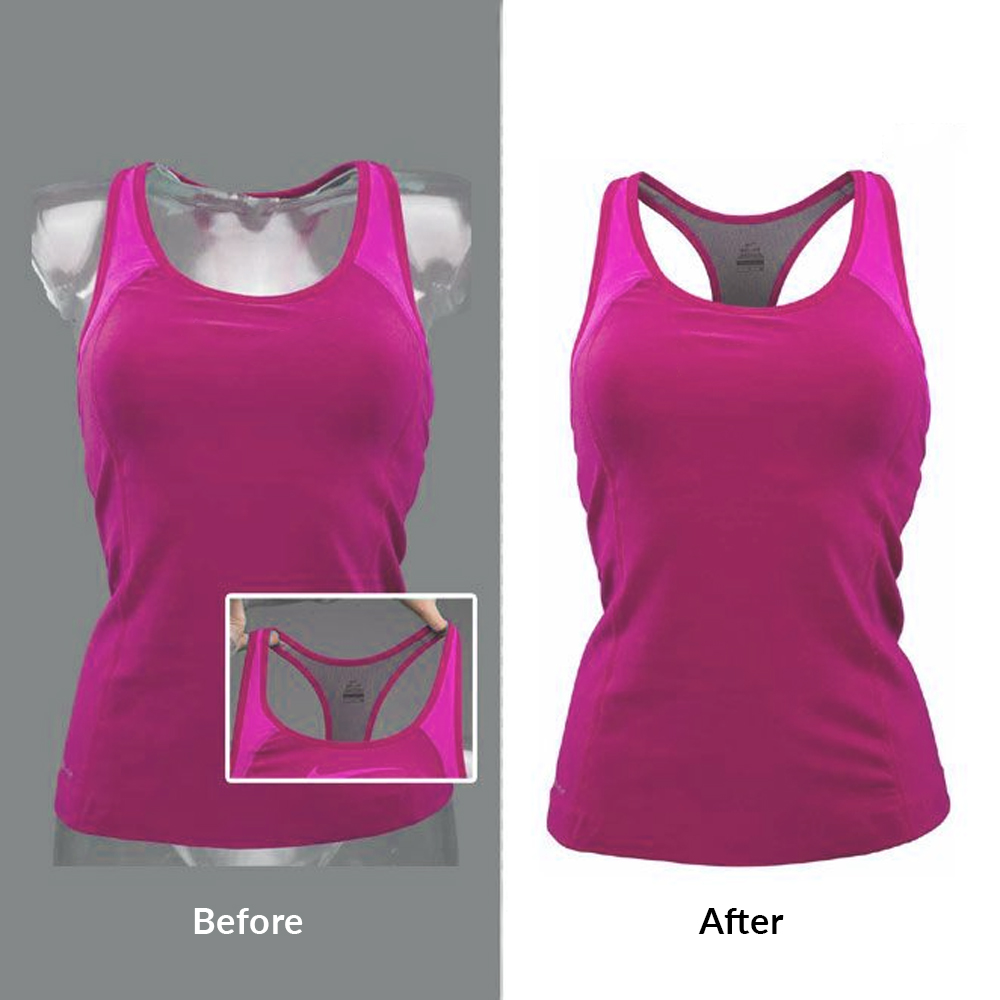
In the world of premium e-commerce fashion, the Ghost Mannequin (Invisible Mannequin) effect is heavily relied upon to showcase product fit and form. However, merging two separate exposures—the outer garment and the inner lining—introduces a major technical risk: the loss of authentic fabric texture and color shifts.
When image layers are masked, blended, and shadow-optimized in Photoshop, automated filters often over-smooth the material, making luxurious organic cotton look like synthetic nylon. Worse, inaccurate lighting adjustments can alter color profiles, leading to the dreaded “Item Not as Described” complaints from customers.
Maintaining absolute color accuracy and crisp fabric texture across your entire digital catalog requires a deep understanding of lighting physics, color management, and non-destructive compositing. Here is the technical breakdown of how to achieve pristine consistency.
The Technical Challenge Matrix
To protect your catalog’s visual integrity, you must actively balance these lighting and texturing parameters during the post-production stage:
| Technical Challenge | Root Cause in Editing | Advanced Photoshop Solution |
| Texture Flattening | Over-reliance on heavy brush tools or destructive masking. | High-pass overlay filters and clipping mask preservation. |
| Color Shifts / Metamerism | Mixing raw camera spaces with incorrect web sRGB profiles. | Standardizing ICC profiles and hardware color calibration. |
| Unnatural Inner Lighting | Flat lighting gradients applied to the composited inner neck joint. | Multi-directional ambient shading with inner-rim highlights. |
| Harsh Shadow Artifacts | Using generic digital black drop shadows (#000000). | Creating multi-layered soft opacity ambient cast shadows. |
1. Preserving Raw Fabric Texture During Compositing
When you cut out a garment from its background using a manual vector clipping path, the hard edge can sometimes look unnaturally sharp or “clipped.” To compensate, amateur editors often use soft brushes that inadvertently bleed into the edge texture, erasing the fabric grain (like denim weaves, knitwear loops, or silk shine).
The Technical Solution:
- Non-Destructive Edge Refinement: Never erase pixels directly on the image layer. Always utilize Layer Masks. Use a small, firm brush with a slight 0.5-pixel feathering to refine edges without micro-blurring the fabric texture.
- Texture Recovery via High-Pass: If a garment looks slightly soft after background removal, create a dedicated texture recovery layer. Duplicate the fabric layer, apply a Filter > Other > High Pass (keep the radius low, around 1.0 to 1.5 pixels), and set the layer blending mode to Overlay or Linear Light. Clip this adjustment exclusively to the garment mask to pop the true warp and weft of the threads.
2. Locking In Absolute Color Accuracy
Camera sensors, computer monitors, and web browsers all interpret color differently. A red jacket might look scarlet on your studio monitor, crimson on an iPhone, and orange in an outdated web browser.
The Technical Solution:
- Standardize Your Color Space: Your entire editing pipeline must stay locked within a consistent ecosystem. Standardize your files to the sRGB color profile (ICC Profile) before exporting for e-commerce. Web browsers are calibrated to read sRGB; using Adobe RGB or ProPhoto RGB will cause colors to look dull and desaturated online.
- Utilize Color Sampler Targets: When editing a high-volume product line, place a physical digital color target (like an X-Rite ColorChecker) in your initial setup shot. In Photoshop, use the Color Sampler Tool to read the precise RGB values of known color swatches. Ensure that these exact digital markers remain identical across both the outer garment exposure and the inner lining insert.
3. Advanced Inner-Neck Lighting & Ambient Shadow Optimization
The illusion of a “Ghost Mannequin” breaks instantly if the lighting inside the hollow neck joint doesn’t match the light falling on the outside of the shirt or jacket.
The Technical Solution:
- Recreating the Fall-off Gradient: In real life, light fades as it travels deep into an enclosed hollow space. When you composite the inner collar/neck-tag layer behind the front cutout, apply a soft, directional Linear Gradient Map moving from top to bottom. Darken the deepest part of the inner neck by 15% to 25% using a non-destructive exposure adjustment layer. This fall-off gradient replicates natural light fall-off.
- Inner-Rim Highlights: If the key light hits the model from the right side, the inside left of the inner collar should receive a very subtle rim highlight. Manually brush a low-opacity highlight on a separate clipping mask to lock in 3D realistic perspective.
- Multi-Layered Drop Shadows: Avoid using Photoshop’s default drop-shadow tool, which creates an artificial 90s-style glow. Instead, hand-paint your ground shadows. Use a deep, dark gray color (never pure black #000000) at 80% opacity right beneath the fabric edge for the contact shadow, and a broader, feather-blurred layer at 15% to 20% opacity to simulate natural ambient room light diffusion.
Frequently Asked Questions
Q: How do you prevent color shifts when editing ghost mannequin images?
A: To prevent color shifts, you must ensure your entire post-production workflow is calibrated to the sRGB color space. Always embed the standard sRGB ICC profile upon export, as web browsers and mobile devices utilize this framework. Additionally, utilizing color sampler tools to lock in matching RGB values across all exposures guarantees catalog consistency.
Q: What is the best way to maintain fabric texture in Photoshop composites?
A: The best way to maintain fabric texture is to work non-destructively using Layer Masks instead of direct erasing tools. To restore or enhance micro-textures like knits or denim without making them look artificial, you can apply a subtle High Pass filter (1.0 to 1.5px radius) on a separate layer set to Overlay blend mode, clipped directly to the product.
Q: How do you make shadows look realistic in invisible mannequin edits?
A: Realistic shadows are built by stacking two distinct layers instead of using automated drop-shadow tools. First, a dense, thin Contact Shadow is painted directly beneath the item’s base using a deep charcoal tint at high opacity. Second, a wide, highly blurred Ambient Shadow is layered underneath at low opacity (15%-20%) to mimic soft, realistic studio light diffusion.